High Dynamic Range (HDR) - My way
Search for high dynamic range (HDR) photography on Flickr and just see what you get?
Well, the search will return more than a few photos which when viewed you feel like you have just partaken of some kind of mind altering substance.
To be honest aesthetically not really my cup of tea.....
To be clear High Dynamic Range photography is combining photographs of differing exposure to give a result rendering a greater range of tonal detail than the camera can capture in one photo
In just about all of my work I use HDR.
It may not be instantly apparent but I do
My definition of good post production is that one cannot tell it has happened
Here is a good example of how I use HDR
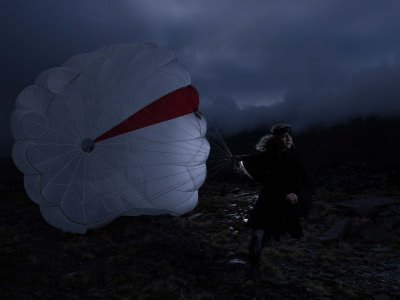
This image was shot as part of 'The Bridge of Doom' series over 3 days in North Wales, in January.
The fashion shoot had a 'spy thriller' theme.
'Agent Laura' parachutes into a forbidden zone to recover a secret map, dodging guards as she escapes.
The original (and rather uninspiring!) idea I came up with was for her to be burying the parachute upon landing
When we were up on the mountain though we were blessed with a breezy day, and we started to fool around with the parachute in the wind
Watching the crew at play made me realize that this could make a great shot
With a little coaching Laura was soon running with the parachute and we were running alongside her shooting as we ran with the 'Lighting team' running just to my right with the Elinchrom Ranger with a Medium Chimera soft box (front screen removed but inner baffle still in place to give a slightly harder more contrasty look with half a stop more power)
The tricky part was shooting just at the right moment when she was in front of the back light, another Elinchrom Ranger but with a grid spot.(we do clone the stand out in the finished pic)
Running on the slate was quite hard, we all fell over at some point.
We did about 20 'runs' before we were exhausted
We got one frame
But my friends all you need is one frame if its a 'killer'
Here it is straight out of the camera....
Shot on a Phase One P30, 250th sec at F8
Pretty good as it is but missing some detail in key areas, notably the jacket which is made from just about the most extremely non reflective fabric known to mankind
The parachute too is just a 'shade to 'hot' for my liking
So, I processed the image a second time, in Capture One, this time at + 2.5 stops

To some photoshop wizards out there this may seem a long winded way to go about it, but it works for me.


